
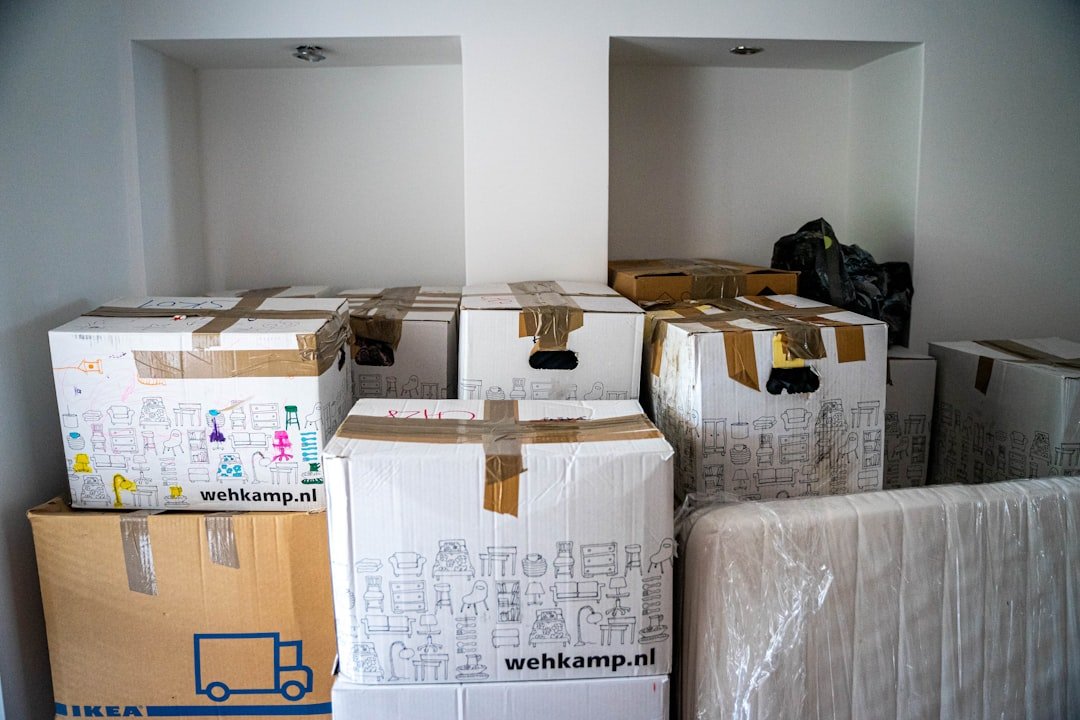
A reusable moving crate return checklist helps you finish a Nashville move without losing track of rented containers after the furniture arrives. The packing inventory tells you where your belongings went. A separate return record tells you which empty crates, lids, dollies, and other rented pieces still need to go back to their provider.
Start the return plan when you receive the crates, not after the rental deadline approaches. Record the actual quantity, condition, provider instructions, agreed return location, and responsible person. JM Moving’s physical moving scope and a separate rental company’s return agreement are different arrangements, even when the same containers appear in both plans.

1. Establish the starting count before packing
Count the containers you actually receive. Compare the count with the provider’s receipt while the crates are still empty and accessible. If lids, wheeled bases, straps, or dividers are separate rental items, list them separately. Do not assume a stack of ten crates includes ten loose lids or that every accessory belongs to the same supplier.

Record existing cracks, damaged handles, missing closures, or unusual residue and ask the provider how to handle discrepancies. Avoid using a visibly damaged container until the responsible provider has reviewed it. A dated note and a clear photograph create a useful reference, but they do not decide responsibility for a later charge or replace the rental agreement.
2. Keep the rental agreement separate from the move inventory
A Nashville crate rental inventory should show the provider’s name, the order reference, collection date, due date, approved return method, and contact for questions. Store payment details and other private information separately from labels that will be visible to a crew or neighbors. A neutral order code is usually enough to connect a stack with the correct record.
Check the actual provider’s rules rather than assuming all reusable-box services work alike. For example, U-Haul’s Ready-To-Go Box page describes returning its rented boxes to the same pickup location and requesting additional time if needed. That example does not establish another provider’s policy, JM Moving’s participation, local stock, or your rental terms.
3. Use two identifiers when the provider already has a number
Leave the supplier’s barcode, serial mark, or permanent identification intact. If you need household room labels, use the method the provider permits and keep those labels distinct from its own asset number. The rental number identifies the container; your room code identifies the contents and destination. Both can be useful without replacing one another.
For rented crate labels, record a simple relationship such as provider asset 432, household code KITCH-02, destination kitchen. Do not write directly on rented plastic or attach strong adhesive unless the supplier permits it. Ask how temporary labels should be removed, and avoid aggressive solvents or scraping that could damage a surface or obscure the provider’s mark.
4. Track four stages instead of a single checkmark
Use separate statuses for packed, delivered, emptied, and returned. A crate can be at the new home while still holding kitchen utensils. Another might be empty but waiting for an inspection. A third may already have been handed back. A single “done” column hides these differences and makes the outstanding count harder to understand.
Keep the moving bin return record current when a crate changes hands. If a family member takes an empty container to another room for temporary storage, record its new location. Do not put possessions back into a crate marked ready for return without changing that status. One small update is easier than reopening every nested stack at collection time.
| Household code | Provider asset | Current location | Status |
|---|---|---|---|
| KITCH-02 | 432 | Kitchen | Delivered, still packed |
| OFF-01 | 587 | Return staging area | Empty, inspection pending |
| LIN-03 | 611 | Provider receipt reference | Return confirmed |
This example illustrates a record format. Replace the numbers and statuses with your actual observations; it is not a receipt or evidence that a supplier accepted any container.

5. Inspect each empty crate before nesting it
An empty crate inspection should include the bottom, corners, lid recesses, handles, and any removable insert. Check for keys, charging cables, small hardware bags, photographs, and paperwork that could hide beneath packing material. Inspect one container at a time in good light, then mark it checked before adding it to the return group.
Keep belongings found during the inspection with their room or owner record. Do not throw away an unidentified bag just because it was beneath paper. If the crate held private documents, check for labels or papers that disclose information. Follow the provider’s cleaning instructions and allow any approved cleaning process to finish before closing or nesting containers.
6. Choose a return staging area that stays usable
Designate a dry, accessible place for checked empty crates that does not obstruct a doorway, stair, hallway, exit, or ongoing unpacking work. Follow the manufacturer or rental provider’s stacking and nesting instructions. Do not build a tall pile simply because empty containers feel light, and do not use a crate stack as a ladder or work platform.
Keep different suppliers’ equipment apart. A color resemblance is not proof of ownership. Attach a temporary staging sign with the order code and count, using the permitted labeling method. If the building has rules for common areas, confirm them before placing returns in a lobby, loading area, or corridor.
7. Confirm who handles the return trip or collection
Ask who is responsible for arranging pickup, carrying the empty containers, providing access, and receiving the return acknowledgment. If you want JM Moving to handle any additional transport, describe that request and confirm whether it is accepted in writing. Do not assume a household delivery includes a later crate-return visit.
For a collection, confirm the agreed window and where the provider is allowed to enter. For an owner drop-off, confirm the destination and current acceptance hours directly with the provider. If the schedule changes, contact the responsible party before relying on an extension. This guide does not quote fees, waive deadlines, or promise that extra time is available.
8. Reconcile exceptions before the final handoff
Create a short list of missing, damaged, unemptied, or disputed items. Separate a container awaiting review from the checked return stack so it is not overlooked. Tell the provider what you observed without guessing the cause. Keep relevant photographs, the starting count, and the return record together for the agreed review process.
At the crate pickup handoff, count the actual pieces being transferred. Ask for an acknowledgment appropriate to the provider’s process, such as a receipt or order update. Save it with the original rental record. A photograph of crates outside a door does not by itself establish that the supplier received them or closed the rental.
9. Close the record without losing the moving inventory
After the provider confirms the return, mark the returned quantity, date, and receipt reference. Keep any unresolved difference visible until it is settled. The contents inventory may still be useful even though the rental record is closed, particularly if you are unpacking slowly or looking for a missing accessory.
Use the room inventory checklist for household contents and the packing scope checklist for assigned work. The two records answer different questions: where your possessions belong, and who is responsible for each step. Neither substitutes for the supplier’s return terms.
Keep shared-household returns from becoming a guessing game
If more than one person is unpacking, choose one person to maintain the return count and ask everyone to use the same status terms. A handwritten sheet near the staging area can work as well as a spreadsheet if changes are recorded consistently. The important point is that there is one current version rather than several different totals in messages.
Before a return appointment, ask each room owner whether any rented containers still hold belongings. Check closets and temporary storage areas without opening another person’s private boxes unnecessarily. Have that person inspect their own container and report its code. If a crate must remain packed, remove it from the ready group and confirm the resulting count with the provider.
Do not allow speed to replace the final belongings check. A return trip made with an overlooked passport, hardware pouch, or work document inside can create a second problem after the move appears finished. A deliberate empty-container check is a small part of the schedule that deserves its own responsible person and clear completion note.
Final return checklist
- Compare the starting rental count with the actual containers received.
- Match each household code with the provider’s asset record.
- Ask every room owner about crates still holding belongings.
- Inspect emptied containers, corners, lids, and inserts for overlooked items.
- Use only the provider’s approved label-removal and cleaning method.
- Separate equipment belonging to different suppliers.
- Keep unresolved damage or count differences on an exception list.
- Confirm the return location, timing, access, and responsible person.
- Count the pieces at handoff and obtain the provider’s acknowledgment.
- Save the return confirmation and retain any unresolved issue in the record.
Ten frequently asked questions
Does JM Moving rent reusable crates?
This article does not establish a crate-rental service or inventory. Ask JM Moving about your proposed containers and physical moving scope, and confirm any rental arrangement directly with the actual supplier before relying on it.
What should I count when crates arrive?
Count the containers and any separately supplied lids, dollies, dividers, or straps. Compare them with the receipt and record visible condition before packing. Ask the provider to resolve a discrepancy rather than assuming the paperwork is correct.
Can I replace the supplier’s labels with room labels?
Keep the supplier’s identification intact. Add your own room code only through an approved labeling method, and record the relationship between that code and the rental asset number. Do not permanently mark rented equipment without permission.
When is a crate ready to return?
It should be emptied, checked for overlooked belongings, prepared according to the provider’s instructions, and included in the agreed return count. “Delivered to the new home” and “ready to return” should be separate statuses.
Can I leave empty crates in a shared hallway?
Confirm building permission first and keep required access routes clear. A hallway is not automatically an approved storage or collection area. Choose a safe, dry staging location that works with the building and provider’s instructions.
What if I need more time to unpack?
Contact the rental provider before the agreed deadline and request its current options. Record any confirmed change. Do not assume an extension is automatic or that a moving company can change another supplier’s terms.
Should I clean crates with a household solvent?
Use only the provider’s approved cleaning method. Strong chemicals, scraping, or adhesive removers can damage surfaces or identification marks. Ask about unfamiliar residue instead of improvising a treatment on rented equipment.
What if a crate is missing?
Check the location record, unopened rooms, vehicles, and other household contacts. Tell the provider what remains unresolved and follow its process. Do not substitute a similar-looking crate from another owner or supplier.
Does a pickup photograph prove the return is complete?
A photo is supporting documentation, but it may not prove receipt or close the rental. Obtain the acknowledgment used by your provider and compare its accepted count with the pieces actually handed over.
What records should I keep after returning everything?
Retain the original count, agreed terms, approved changes, exception notes, and return confirmation as needed for your records. Keep personal contents details private and separate from public-facing container labels.
Discuss your Nashville moving plan with JM Moving
Share the actual inventory, requested date, packing needs, and access conditions with JM Moving. Call (615) 710-9990 to ask about the next step. Confirm the accepted scope, price, availability, and responsibilities in writing before relying on a service arrangement.